Read this before editing your social media videos

Video editing is part of your life. It almost feels like breathing, sleeping, or eating. It’s something you just do as a creator.
Everything from transitions, subtitles, special effects… It just flows for you.
However, are you doing it the right way? Or are you just following what you learned years ago, and it has been working just okay for you? Does it help attract brand sponsors for videos or does it set you apart from the rest of the creator economy?
This blog post will be a tremendous life-changing experience for you as a content creator.
For today’s insight article, we’ll dig deeper into the depths of social media video editing with the help of our newest partner, WeVideo, and show you exactly how you should do video editing for social media.
How to edit your social media videos?
Due to popularity, we’ll go for explaining what a high quality video should look like and best practices for editing on any social media platform including Tik Tok, Facebook, YouTube, and Instagram.
Let’s take a look at Tik Tok first.
According to Simplified, the best way for a beginner is through the built-in video editing software on Tik Tok. However, it is very basic and has not much to offer (which WeVideo can help you with, but we’ll continue on this later), yet it does the work.
Continuing with the subject, there are 3 principal methods to do this seamlessly:
- Saving your video and then re-uploading it
This seems to be the easiest way to do this, but it’s up for discussion. This will allow you to make minor edits to your social video, like adding subtitles. Yet, more elaborate editing will require a third-party app.
To perform this you will need to…
- Head to your profile by clicking on the “Me” icon in the bottom right corner.

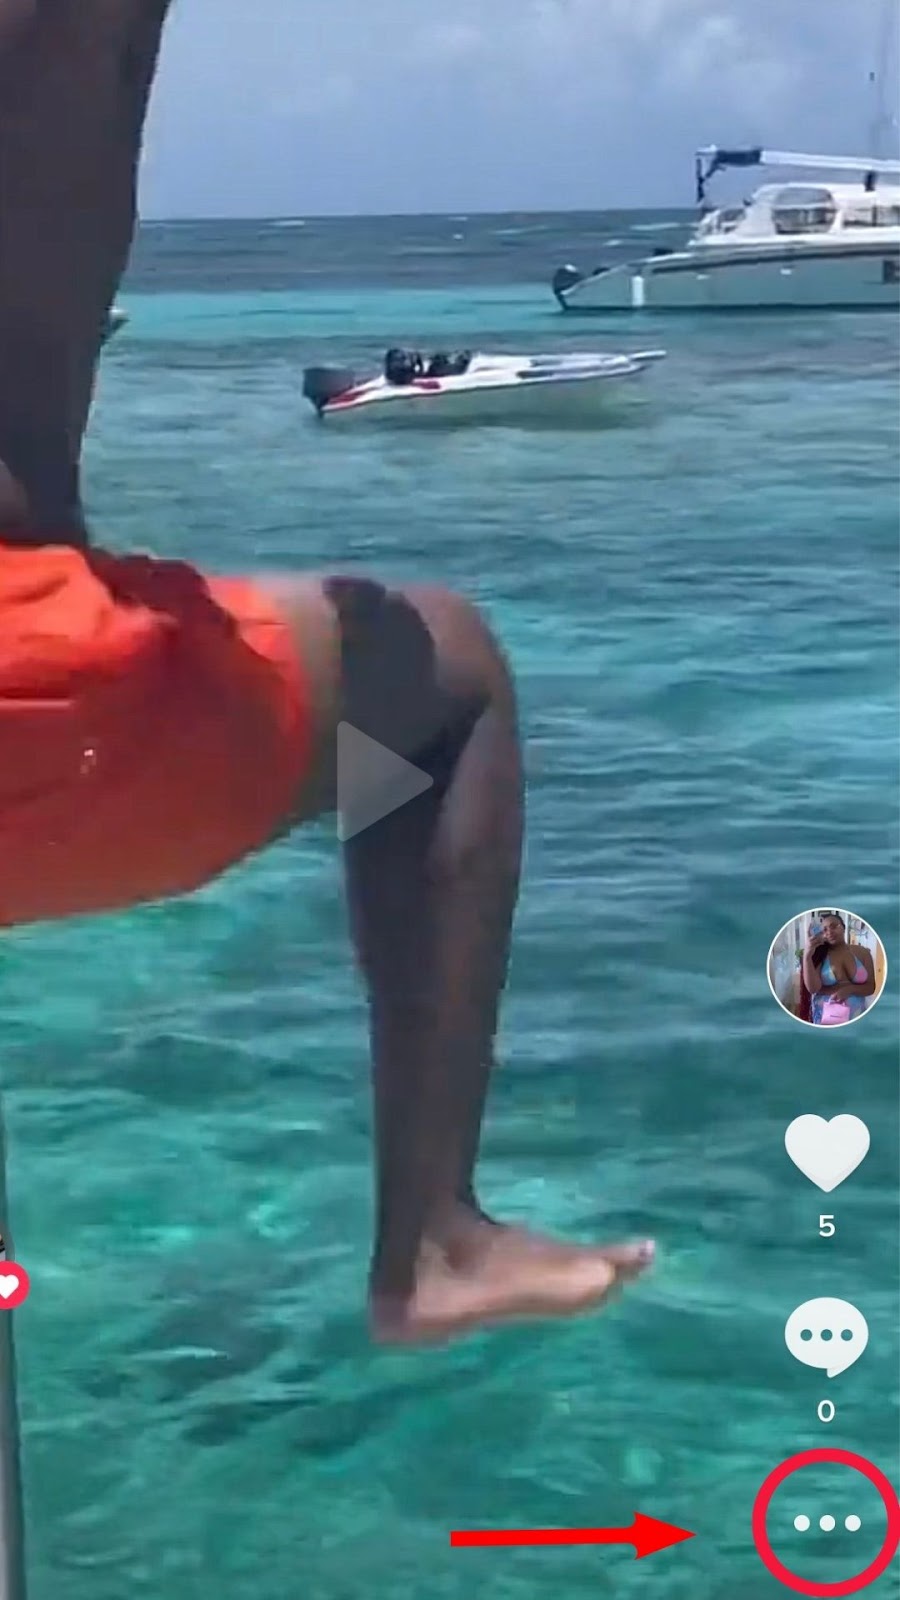
- Select the social video you want to edit.

- Go to the side menu to find a triple-dotted icon. You will get several options to share and save high quality video.
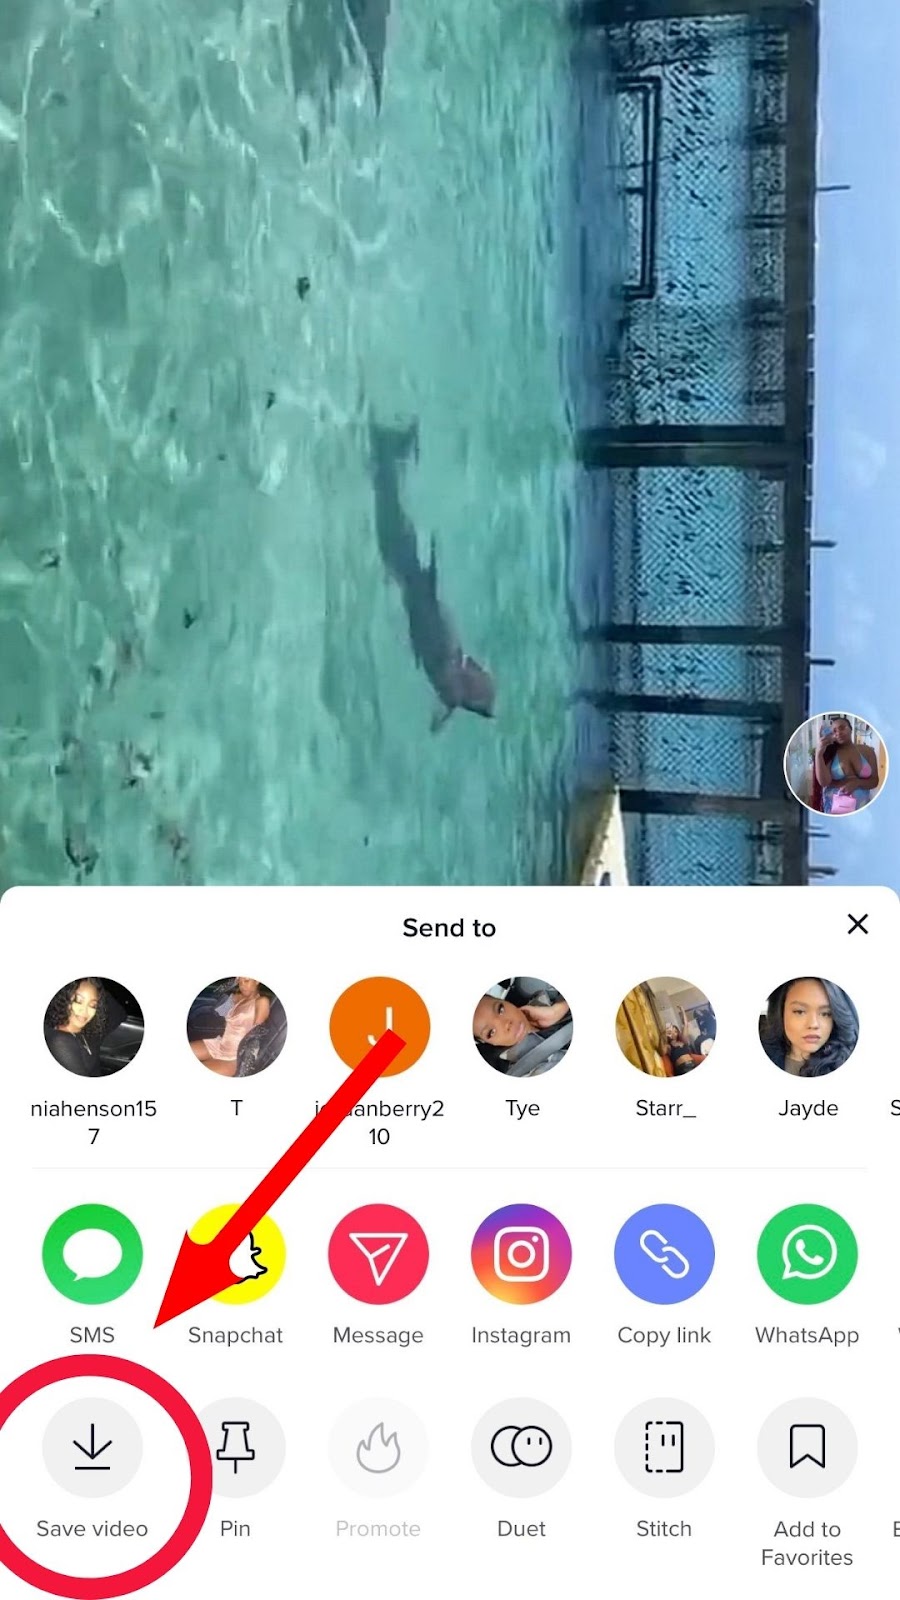
- Choose “Save video”. Now your uploaded video is saved in your gallery with all the effects, music, and filters that you have used.
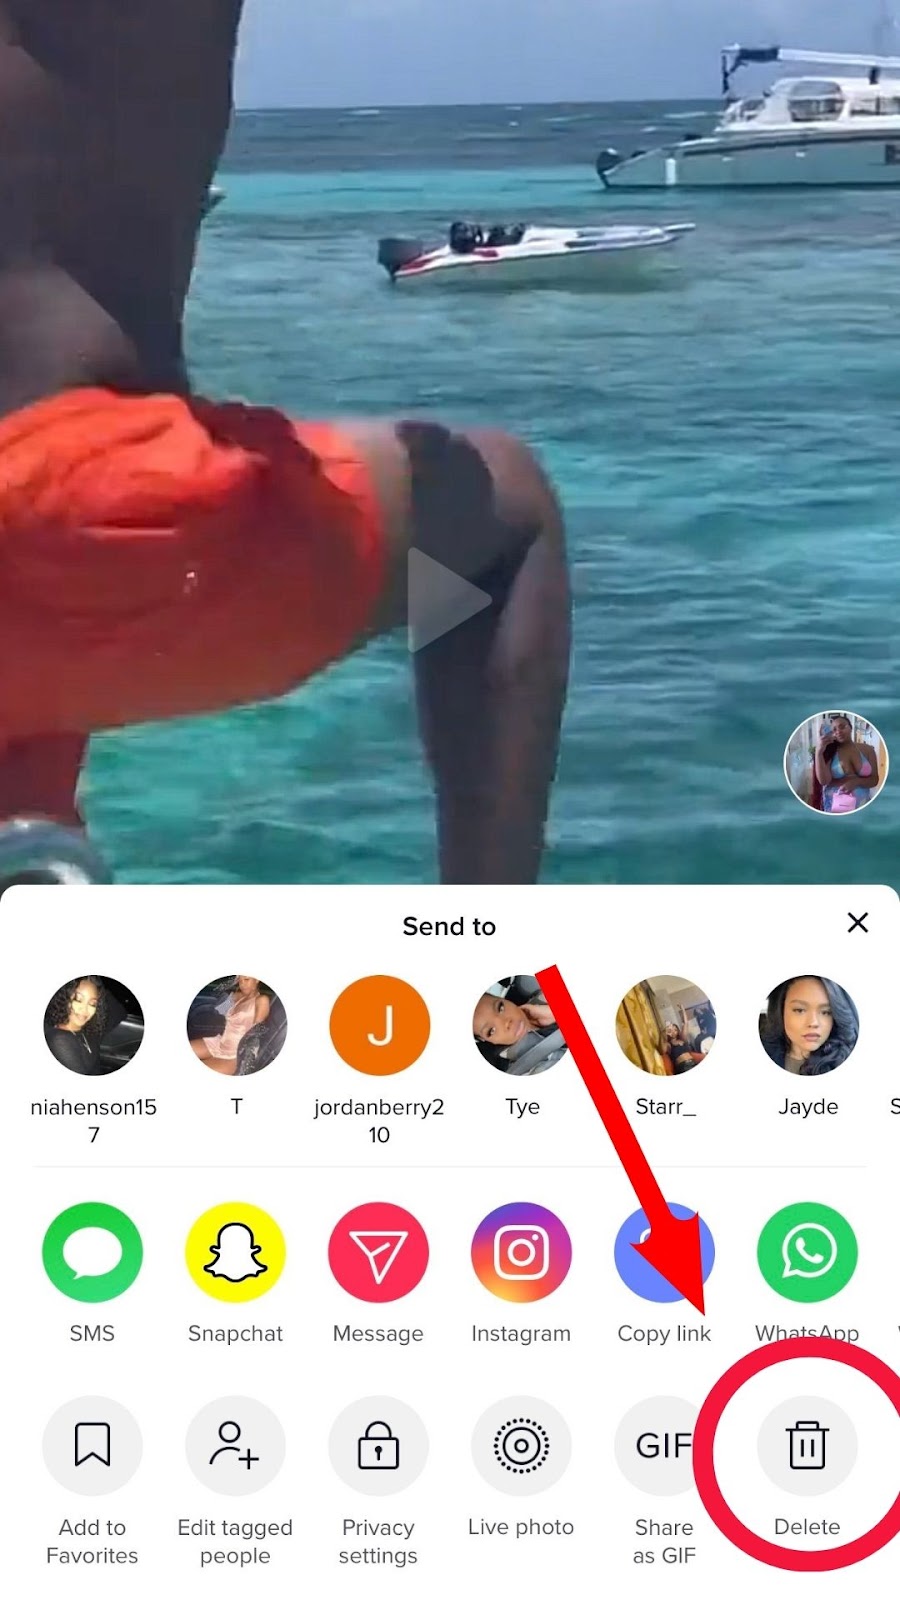
- Once you have saved your TikTok video, you can delete the uploaded video before more people can see it.
And you’ll be good to go unless you require something a bit more tailored.
That’s when the second method comes into play.
2. Re-making your entire video
Yeah, we know… It’s a complete task to perform if you require more extensive editing for your video. Yet, it’s not that hard if you think about it.
To accomplish this, you’ll need to start by…
- After deleting your first attempt before more people see it.
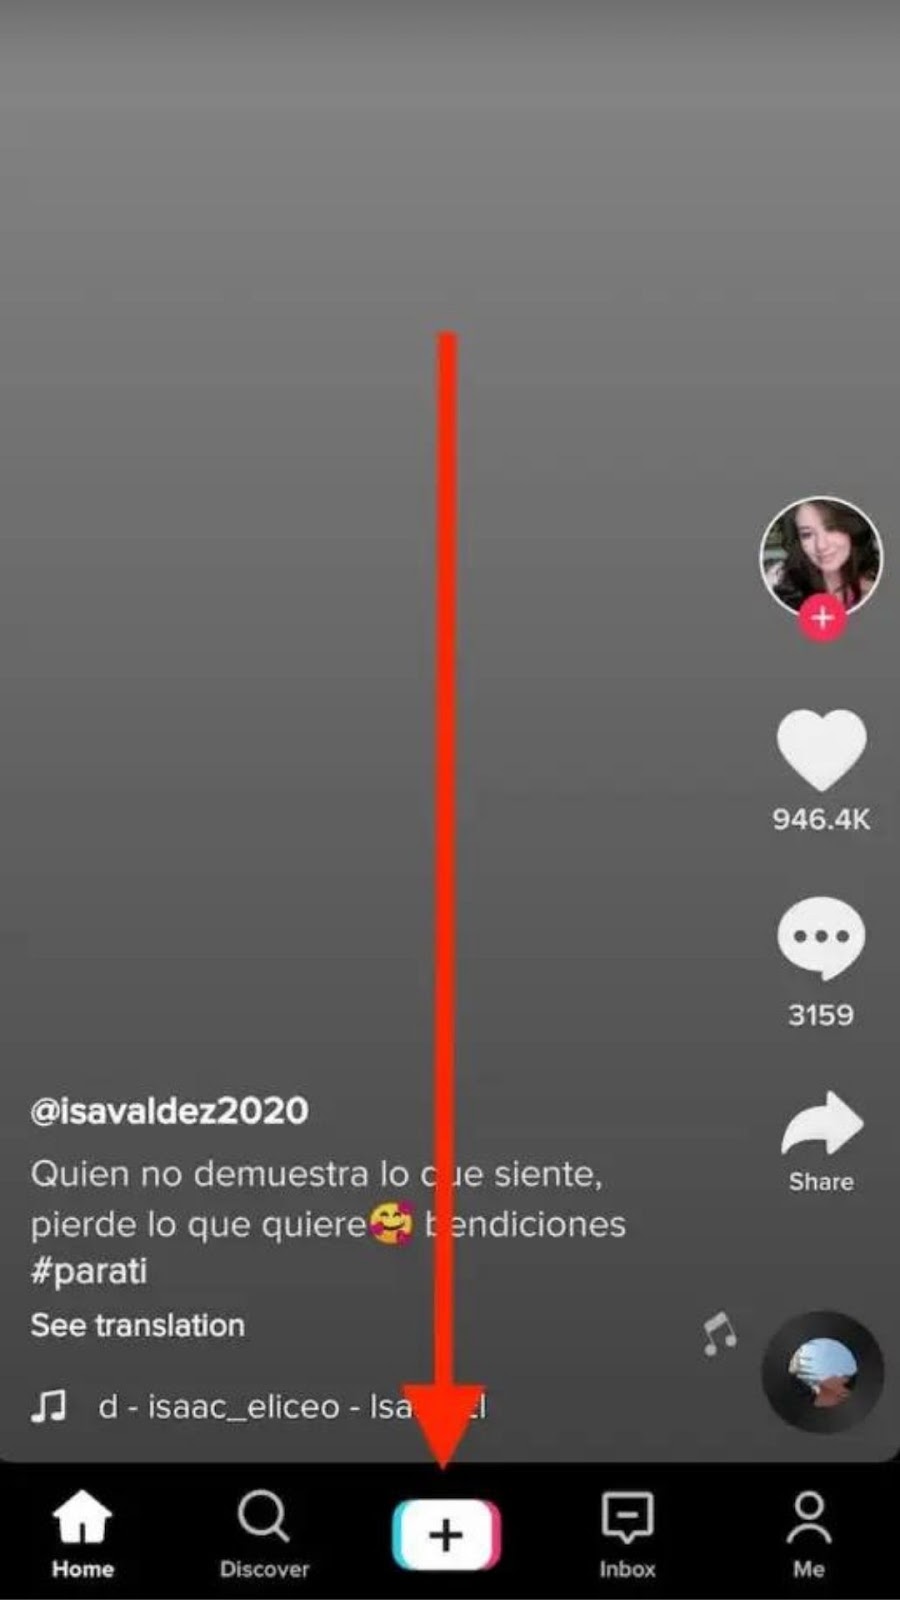
- Then, go to the Plus icon on TikTok. Find the unedited video in your gallery and add it.
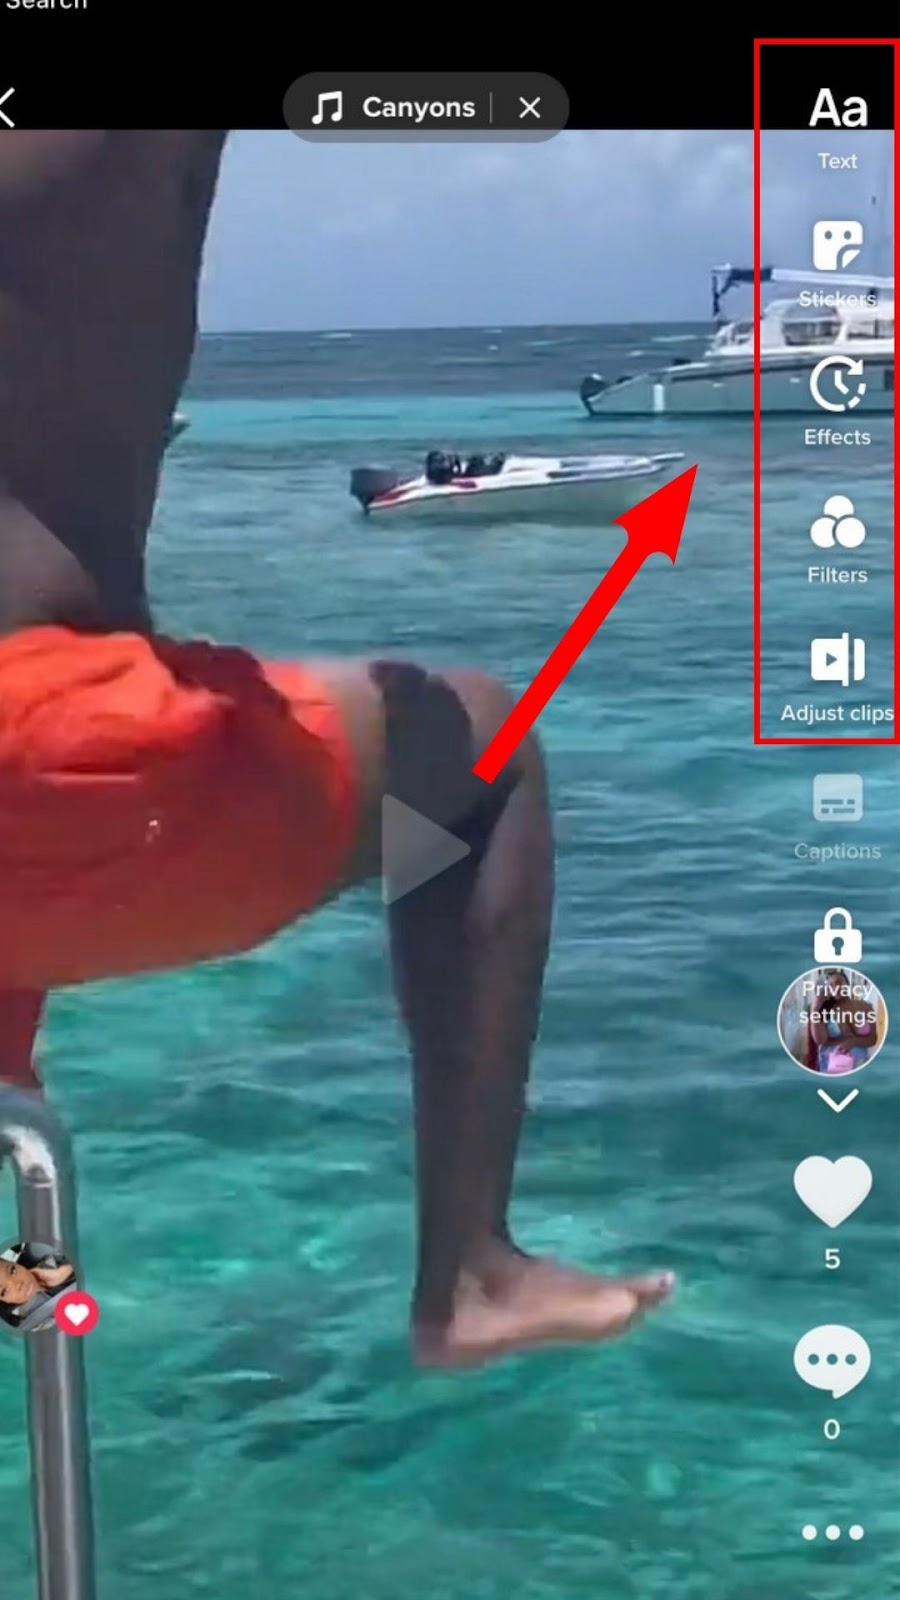
- After that, add all your effects, including the new ones you were missing before. You can choose from all the stickers, sounds, music, texts, and other effects.
- Finally, post your replacement video only after ensuring that all your edits are in place.
This works, but it’s not for everyone when you could use a third-party app like WeVideo.
And that’s how we arrive at method #3, which goes for…
3. Editing with saved drafts
This will come in handy to avoid typos or manual mistakes when posting.
To apply this quick editing hack, you’ll need to…
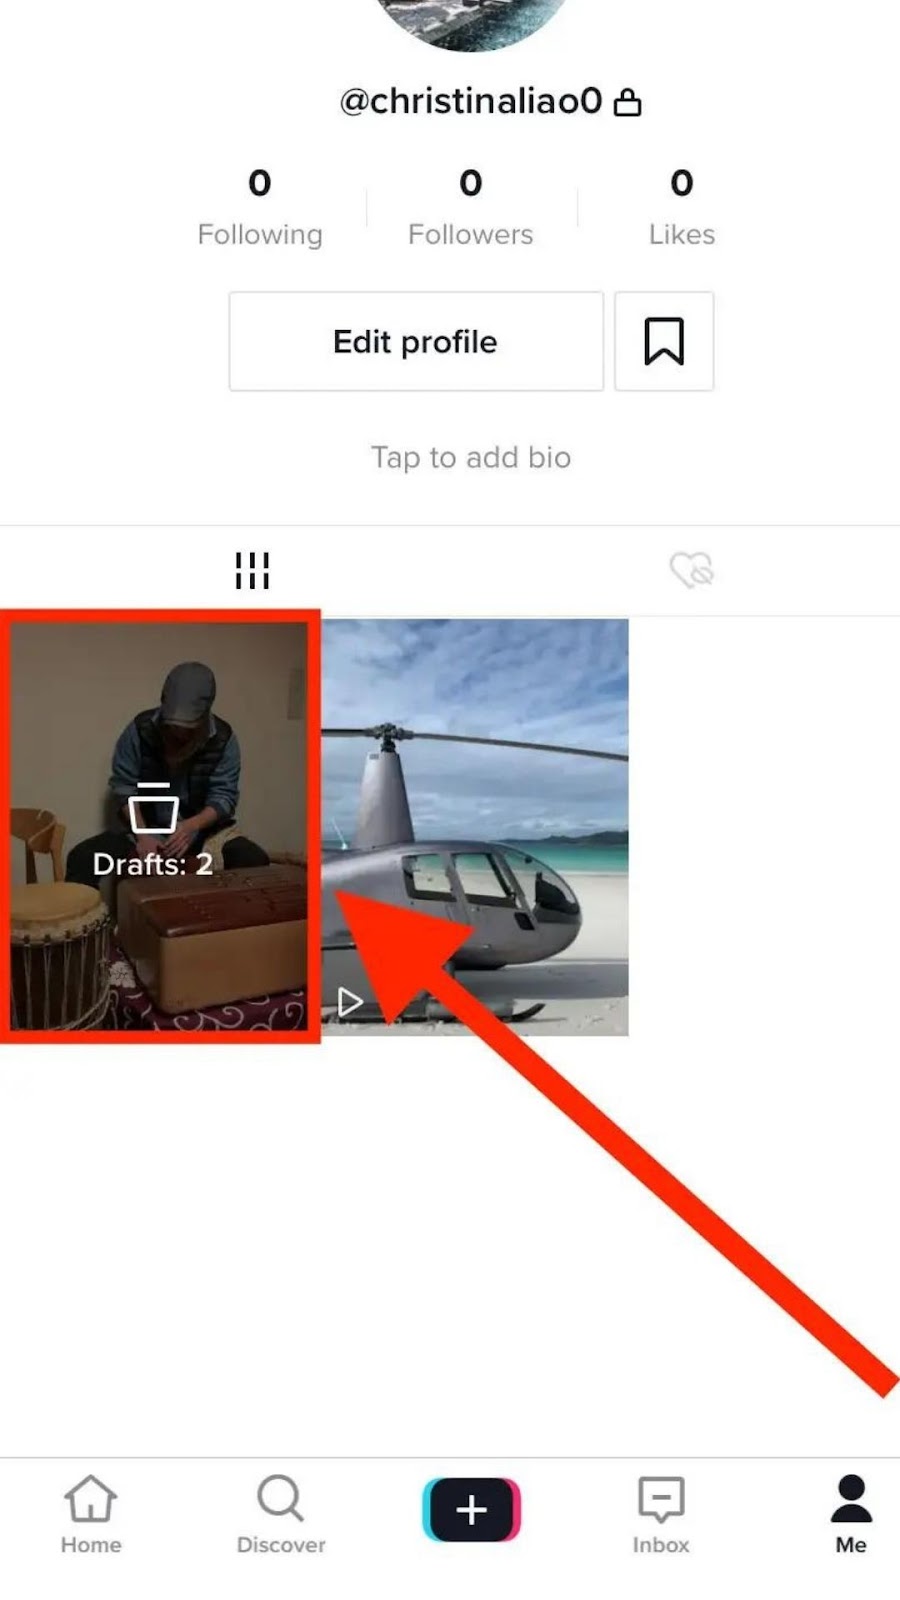
- Go to the “Me” icon again.
- Open “Drafts” to find all your saved videos. Select the video that you want to edit.
- Add your finalized TikTok caption and upload. Alternatively, you can tap the back arrow at the top to keep editing your video.
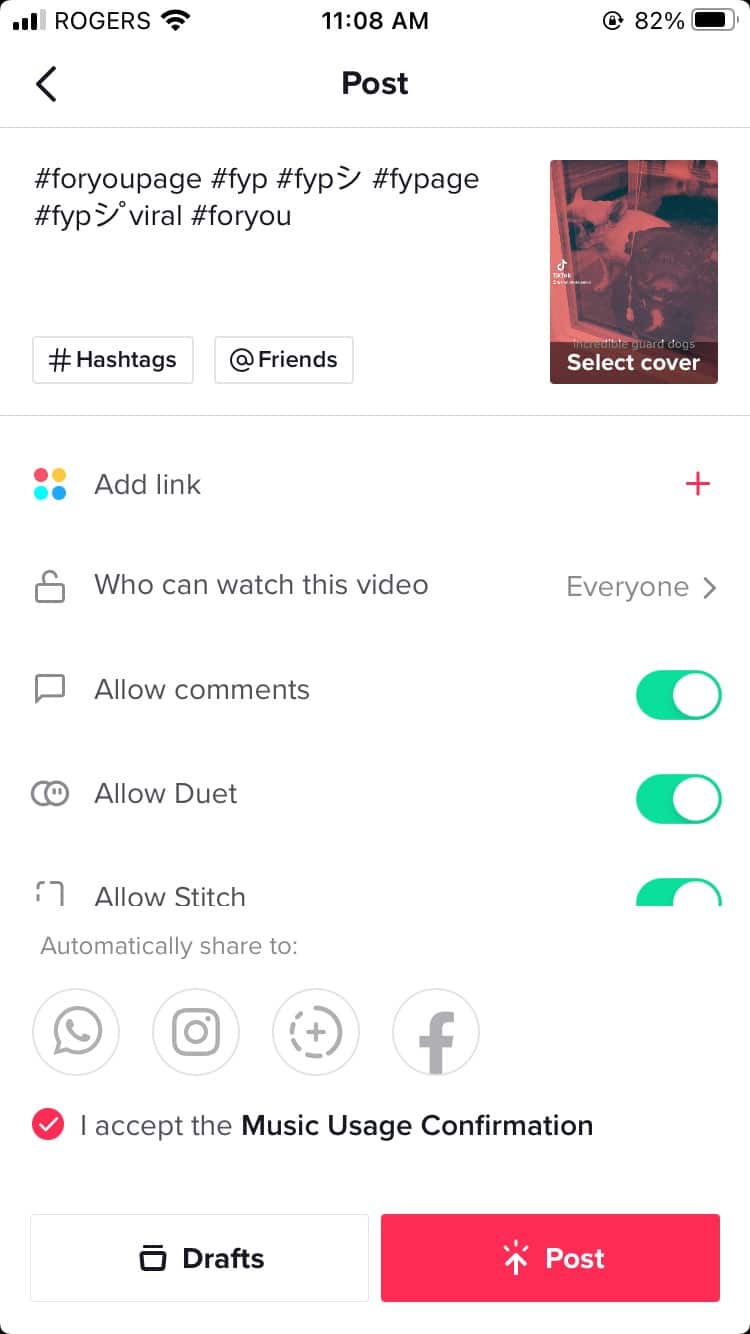
- Upload it once you are satisfied with your edits.
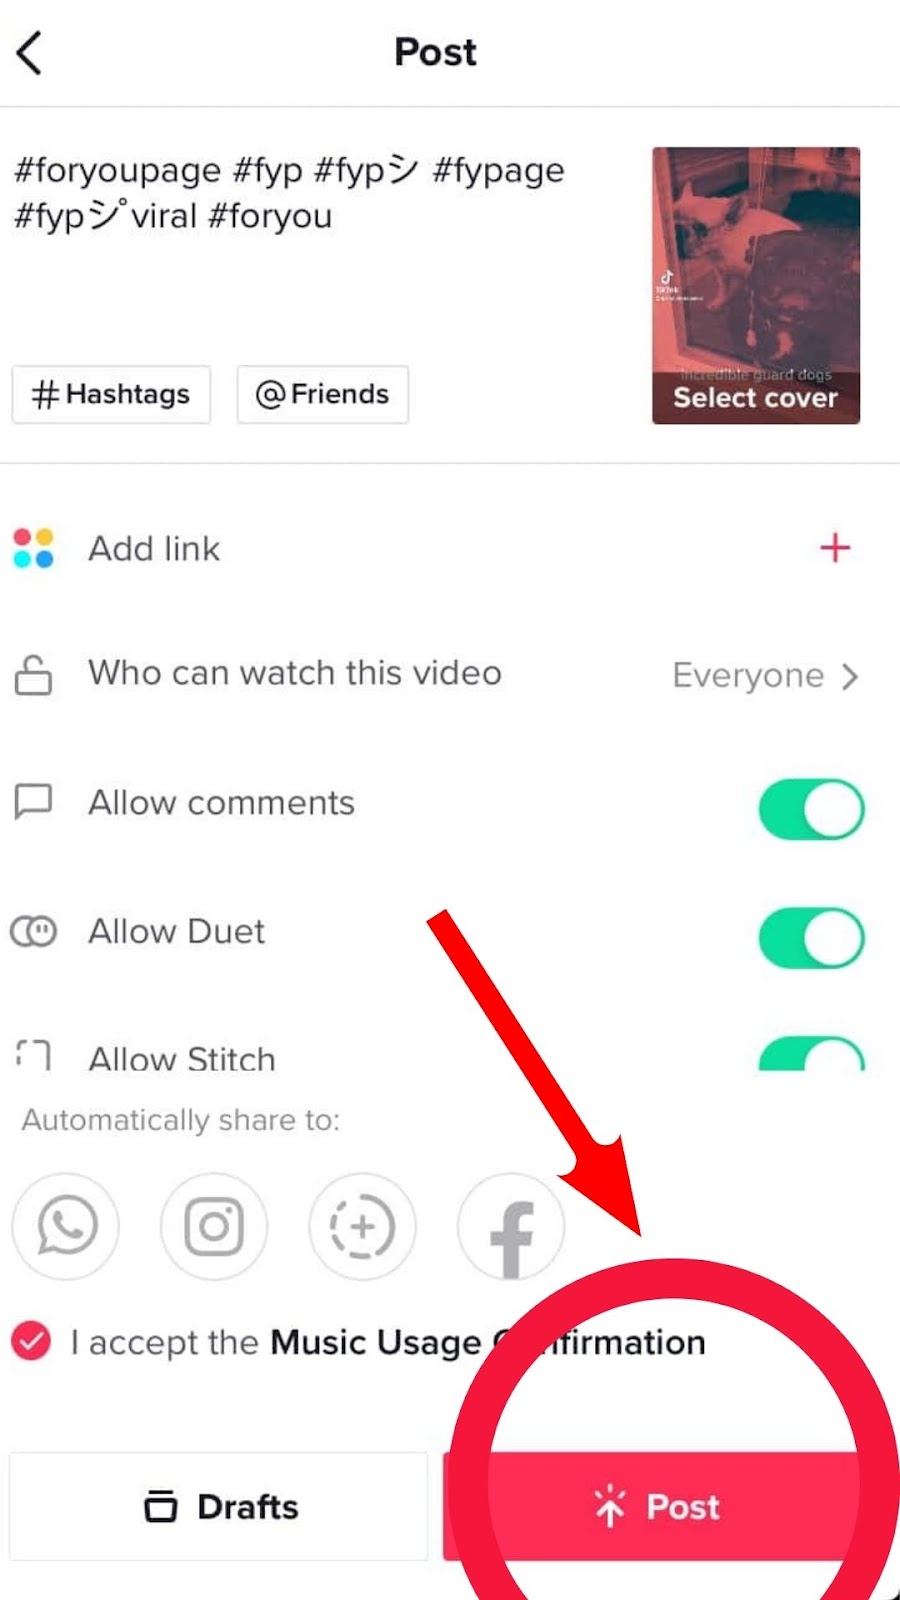
And, voilà!
You have an edited Tik Tok ready to rock and roll with twisting, shouting, and trendy dances.
And then when it comes to YouTube…
YouTube has an extremely basic editing built-in platform. Not because we say so — it’s Hubspot’s take on it.
Yet, it’s true. It’s a very basic approach to video editing but works well for basic needs.
Here’s a complete breakdown of how it works and what to include when editing a video on YouTube:
First, you need to make sure you’ve created an engaging thumbnail for your video. This is the first thing a viewer will see before clicking on your social media video, so it’s your first opportunity to capture their attention.

This could be…
- A screenshot of a specific moment from your video
- A text-based title
- Even a quick reaction moment
The important thing is to create an exciting moment to leave your audience wanting more.
Second, you need to use engaging elements in your video.

This is a fantastic way to keep your audience engaged, and it’s something never to overlook when editing a video for this social media platform. Anything from text, images, shapes, animation, music, and transitions are engaging elements that have a proven effect on retaining viewers for more extended periods.
However, don’t overuse these, or you’ll cringe your audience to death.
The third is to use a baseline video editing style.

This makes total sense — it’s your brand as a content creator what we’re talking about, and you want to own something nobody else can replicate. Something that makes you recognizable or unique. And editing does the work for this.
A consistent and repeatable way to edit your videos, thumbnail style, transitions, or added elements will help. A great example of this is how some YouTube content creators and influencers create expectations by sharing a highlighting moment from their videos at the beginning to draw people’s attention.
And the fourth and final best practice is… Storytelling.
Yes, good ol’ storytelling. But not just a meh story. A worthy-to-remember-story.
Think of a book. Your videos should have a flow, an argument, and should guide its viewer through the jungle without them feeling lost, just like a book induces the reader to finish those countless pages.
This helpful course from ilovecreatives on video creation and storytelling is pure magic too when applied to YouTube editing best practices — check it out!
Facebook has its own knack for speaking.
According to Meta’s help center, these valuable checklists will help you edit your video correctly, avoid strikes, and make a positive impact while staying compliant with its regulations:
Considering we’re talking about content-creator-owned video content, you’ll need to make sure to…
“Give viewers a true video experience and take best advantage of the video’s capacity for storytelling through movement and motion.
Including a couple of photos won’t hurt you. Just be sure the majority of your video is actual video. Don’t use the following:
- Slideshows of images
- Text montages
- Looping video”
Yet, when editing, you also want to make sure your social video content has the necessary effects, transitions, and subtitles to go viral… While also keeping a reasonable length.
“Longer videos are ideal for episodic shows, developing storylines, live streaming and so on.
- 1-3 minutes (good)
- 3+ minutes (best)
Shorter videos are ideal for sharing fun and interesting moments, teasers, announcements, polls, ads and so on.
- Less than one minute
- Maximum 15 seconds for Stories”
This will help you stay safe and get a higher view rate for your videos.
Finally, Instagram tells a different story.
As an image-focused platform, how your Instagram video looks on mobile devices is extremely important, given that 25% of the entire mobile population uses Instagram.
That’s why Instagram’s help page explains how straightforward the editing in-app process is.

“Using the creative tools at the top of the screen, you can:
- Add emojis.
- If you use the Classic text style, you can adjust text size up or down by tapping and using the slider.
- Center text or align left or right by tapping the text icon (only available for some text styles).
- Rotate and resize the text by using two fingers to pinch and zoom.
- Choose a text color by tapping the colors at the bottom of the screen. Swipe to see more colors, or tap and hold a circle to choose a custom color.
- Change the text style by tapping the button at the top of the screen.
- Add a color background to text by tapping at the top of the screen and selecting a color.
- Pin text to a fixed spot in your video. After taking a video, add text, then tap it and hold. Use the slider bar at the bottom of the screen to scroll through the social video content to find where you want to pin the text. Move the text and tap Pin.
- Type @, then enter someone’s username to mention them.
- Enter a hashtag (example: #flower). People can tap it to view the page for that hashtag.
- Choose from different brushes and drawing tools from the options at the top of the screen.
- Adjust the line thickness by using the slider on the left.
- Choose a color to draw with by tapping the colors at the bottom of the screen. Swipe left to see more colors, or tap and hold a circle for more color options.”
What are things you should include in your video?
A few elements are widely considered essential when it comes to video editing processes.
You want to have this nailed down in your brand kit, from transitions and special effects to subtitles and music.
For example, Eclincher mentions some of these must-haves:
If There’s Talking, Include Subtitles
Adding subtitles will help non-native speakers and hearing-challenged users quickly consume your social media content.
Similarly, videos shared on almost all social media platforms now automatically start or play without sound effects. Including subtitles will help get your message across, whether it’s on mute or not.
Aim For Natural Lighting
Lighting will make or break your videos. And using natural light will help you make it.
When you’re indoors, be sure you shoot videos near a window or door where there’s sufficient light. You can also opt to take things outdoors.
- The Golden Hour, which happens just right before the sun sets, boasts tints of red, orange, and yellow. During this time of the day, the shadows are less dark and the hues are softer.
- The Blue Hour generally lasts 20 to 30 minutes after sunset or before sunrise. It offers a rich, cool tone and a sense of tranquility to your videos. It’s perfect for outdoor settings wherein the sky is deep blue and the background is filled with bluish light.
- Cloudy days are also perfect for outdoor shoots. Though some may think the video looks gloomy, the gray weather makes the light look softer and perfectly spread out.
Consider Using an External Microphone
Just like lighting, audio is also important in social media videos. The built-in mic might not be good enough if you’re filming using your phone. You wouldn’t want your videos to capture sounds of cars passing instead of your narration or dogs barking outside instead of the actual conversation. So, it’s wise to invest in good equipment, including microphones, to ensure that you create high-quality sound.
If You Use Music, Make Sure You’re Allowed To
Music is essential to the success of videos. It grabs people’s attention, controls viewers’ perception of the brand, and sets the mood and connection with the audience.
However, not all songs can be used in videos. Before you add it in, you must secure permission from the rightful owners. Otherwise, you can get into trouble with the platforms for stealing copyrighted materials.”
P.S. Not good enough lighting? Shooting at night? Got a darker light and you 100% need it? Or, got no time to pick an audio-worthy mic and are in a rush? Then, say no more. Our rental kits have everything you need — check them out. These were designed for creators just like you.
P.S.S. Making sure you’re 100% music-safe is easier said than done… Until now. Check out APM Music’s blog to get valuable insights coming from real industry experts.
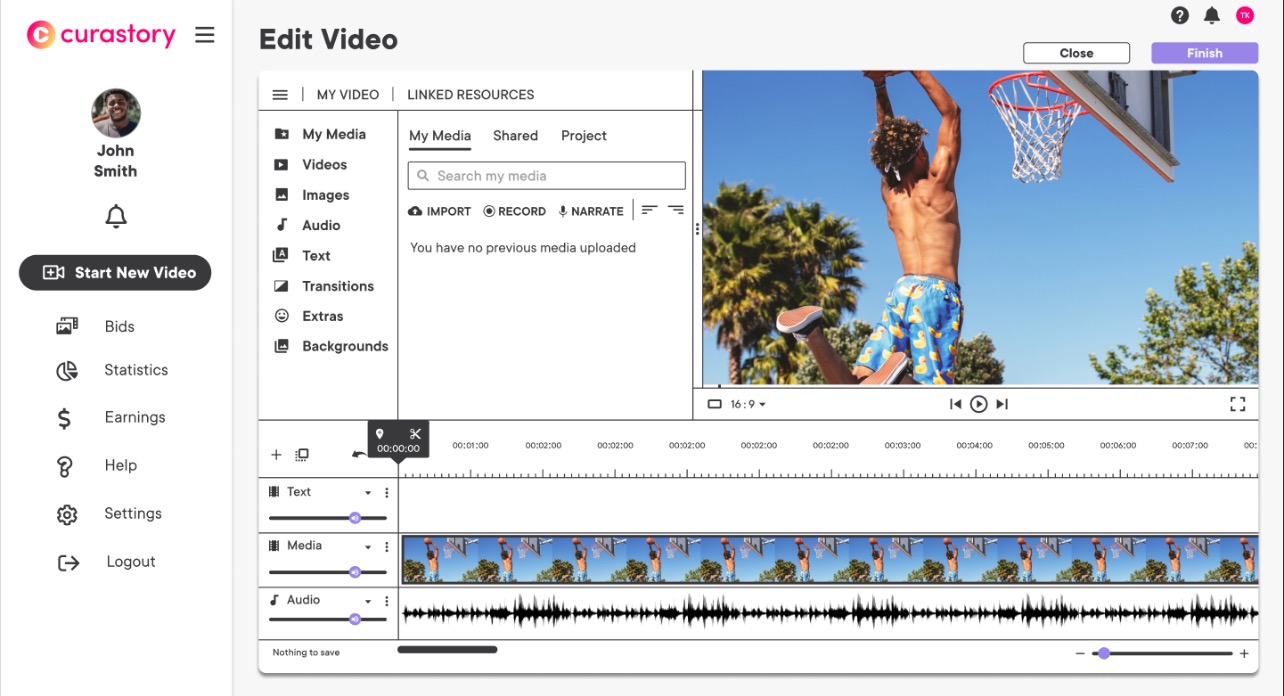
How to edit your video using WeVideo and Curastory in a few minutes?
As you know by now, Curastory is constantly working to provide our beloved creators with the most up-to-date performance tools in the industry, allowing them to power up their brand kits and edit videos with just a few clicks.
That’s why our in-app video editing tool is now powered by WeVideo, allowing you to make your social media videos look professional without breaking the bank.
You don’t even have to be an expert to start sprucing up your videos with WeVideo.
It’s as easy as logging in and letting the platform guide you through the process.
However…
If you want more pro tips on how to edit videos for each platform, WeVideo also has you covered.
For example, if you want to edit your videos for Facebook, their step-by-step instructions are clear as pristine water.
Same as for Tik Tok, when you have to edit and don’t know how to upload videos through your computer.
Or, in case you want to start editing your YouTube videos but don’t know how to start, this video tool will help you out in just seconds.
Also, if you want to edit your Instagram video with just a few clicks, here’s the recipe.
Spoiler alert: It’s all through WeVideo in Curastory’s app, and it’s as easy as counting one, two, three.
Something you just can’t miss as a content creator, for sure.
Got questions?
We always have the answers. Just reach out if you have any questions or doubts about how Curastory and WeVideo can help you turn your social media video editing experience into a walk down the beach.
Take care and have fun filming!
– The Curastory and WeVideo Team


